Configure Notifications and Branding
Set personal alert channels, confirm a custom sender domain, and test which brand settings reach customer output.
Summary
Set up alerts first. Then set up the confirmed sender domain. Then test real output. The Branding page stores more values than Eigenn now applies to email and PDFs. A check is part of the workflow.
Capabilities
You can set personal notification channels for different event categories, customize the email footer and brand attribution, and configure a custom sender domain for workspace emails. Owners can manage sender domains and branding, while members can personalize their own notification preferences.
Prerequisites
Before You Start
- Confirm the active workspace.
- Use an Owner or Member account for notification and branding-value writes.
- Use an Owner account for custom email-domain lifecycle actions.
- Find the DNS administrator.
- Choose a dedicated subdomain such as
invoices.example.com. - Prepare a safe event that can trigger a notification for the team.
Notification preferences are personal. Repeat the alert review for each operator.
Concepts
Notification preferences determine which alert types and channels each operator receives, with different categories for operational, financial, and support purposes. Branding is limited to customization of the email footer and sending domain. Only one provider domain can be active at a time. Custom notification settings are personal and must be reviewed by each operator for their own account.
Workflow
1. Examine the Notification Categories
Open Settings → Notifications. Expand each category. Decide whether its available channel is actionable for your role.
Prioritize:
- invoice overdue, paid, refund, and customer-message events for receivables operators
- reconciliation conflicts, payment matches, disputes, and payout failures for finance operators
- Inbox needs-review and cross-currency matches for document reviewers
- Vault alerts for contract or renewal owners
- Daily Money Briefing for operators who read the assistant digest
Eigenn generates the list from current product events. Not every category shows the same channels.
2. Set Personal Channels
- Turn Email on only when an email is useful outside the app.
- Turn In-app on for work that you expect to read in the notification center.
- Wait for each switch to complete its save.
- Reload the page and confirm the state.
When no prior choice exists, the current page shows the available channel as on.
Important current behavior:
- when you turn off email for the team, Eigenn does not deliver that email to you
- when you turn off in-app, Eigenn lowers the activity priority but still creates the activity record
- no current configurable event shows a Push switch
- the workflow controls the invoice and recovery communications to the customer, not your personal alert toggle
3. Set the Email Footer
Open Settings → Branding and use the Email Branding card:
- Enter Email Footer Text, up to 1,000 characters.
- Set Show "Powered by Eigenn" to the team's preference.
- Select Save.
Both values render in the footer of emails that your customers receive, including invoices, invoice reminders, and export notifications.
Branding has no colors, logo, or invoice layout controls. Invoice colors and logo belong to the invoice template. Settings → General → Company logo is the shared workspace identity value and does not appear in customer emails.
4. Add the Custom Sender Domain
Use the Custom Email Domain card at the bottom of Branding.
- Enter a subdomain.
- Select Add Domain.
- Copy every displayed DNS record name and value.
- Add record priority and TTL when shown.
- Publish the records at your DNS provider.
Eigenn rejects a root domain. The workspace can hold one provider domain at a time.
5. Confirm DNS
- Wait for the DNS provider to publish the records.
- Select Verify Domain.
- Wait at least 60 seconds before you try again, if verification remains pending.
- Continue until the badge shows Verified.
DNS propagation can take up to 72 hours. Repeated clicks cannot accelerate it.
After verification, the card shows the effective sender as invoices@your-subdomain. Email delivery uses the domain only while the workspace keeps the provider domain record.
6. Test Real Delivery
Use a non-customer, reversible team event where possible.
- Trigger an event that has an Email preference.
- Confirm that the intended operator gets it, or does not get it, under their preference.
- Examine the From address and domain.
- Check SPF/DKIM-related delivery results at the destination mailbox.
- Open the in-app notification center and compare the activity.
Do not test customer recovery with an unreviewed message to a real customer.
7. Confirm the Customer-Facing Output
Send a real customer email, or generate a safe preview, and confirm:
- the From address uses the verified sender domain
- the footer shows your Email Footer Text
- the Eigenn attribution matches your Show "Powered by Eigenn" choice
Generate an invoice PDF separately and confirm its template values. Invoice layout and colors come from the invoice template, not from Branding.
8. Remove or Replace the Domain
To replace the domain:
- Confirm that no critical send is in progress.
- Select Remove Domain.
- Confirm the warning.
- Confirm that the next email uses the default sender.
- Add the new subdomain.
- Confirm the new subdomain.
Provider deletion is best-effort. Eigenn clears the workspace record so that you can add another domain.
Behavior specification
Role Matrix
| Action | Owner | Member | Viewer |
|---|---|---|---|
| Save personal notification preference | Yes | Yes | No |
| Save the email footer and attribution choice | Yes | Yes | No |
| Add, confirm, or remove sender domain | Yes | No | No |
| Read notification and branding pages | Yes | Yes | Yes |
Troubleshoot
A switch reverts after a save
Eigenn cannot save the change. Confirm your role and the active workspace. Then try again one time.
In-app activity still appears
The current preference lowers priority. It does not suppress the record creation.
No DNS records appeared
Scroll to the Custom Email Domain card and select Add Domain. Eigenn shows the records only after the domain is added.
DNS verification remains pending
Compare every DNS record exactly. Include the host-name conventions at your provider. Wait for propagation and the 60-second retry cooldown.
Email uses the default sender after verification
Reload Branding and confirm that Verified still appears. Delivery ignores a domain string that has no provider record. This is by design.
Invoice colors or logo did not change
Branding sets the email footer and the sender domain only. Invoice colors, logo, and layout come from the invoice template. Change them there, then check the generated PDF.
Diagrams
Rendering diagram…
Screenshots
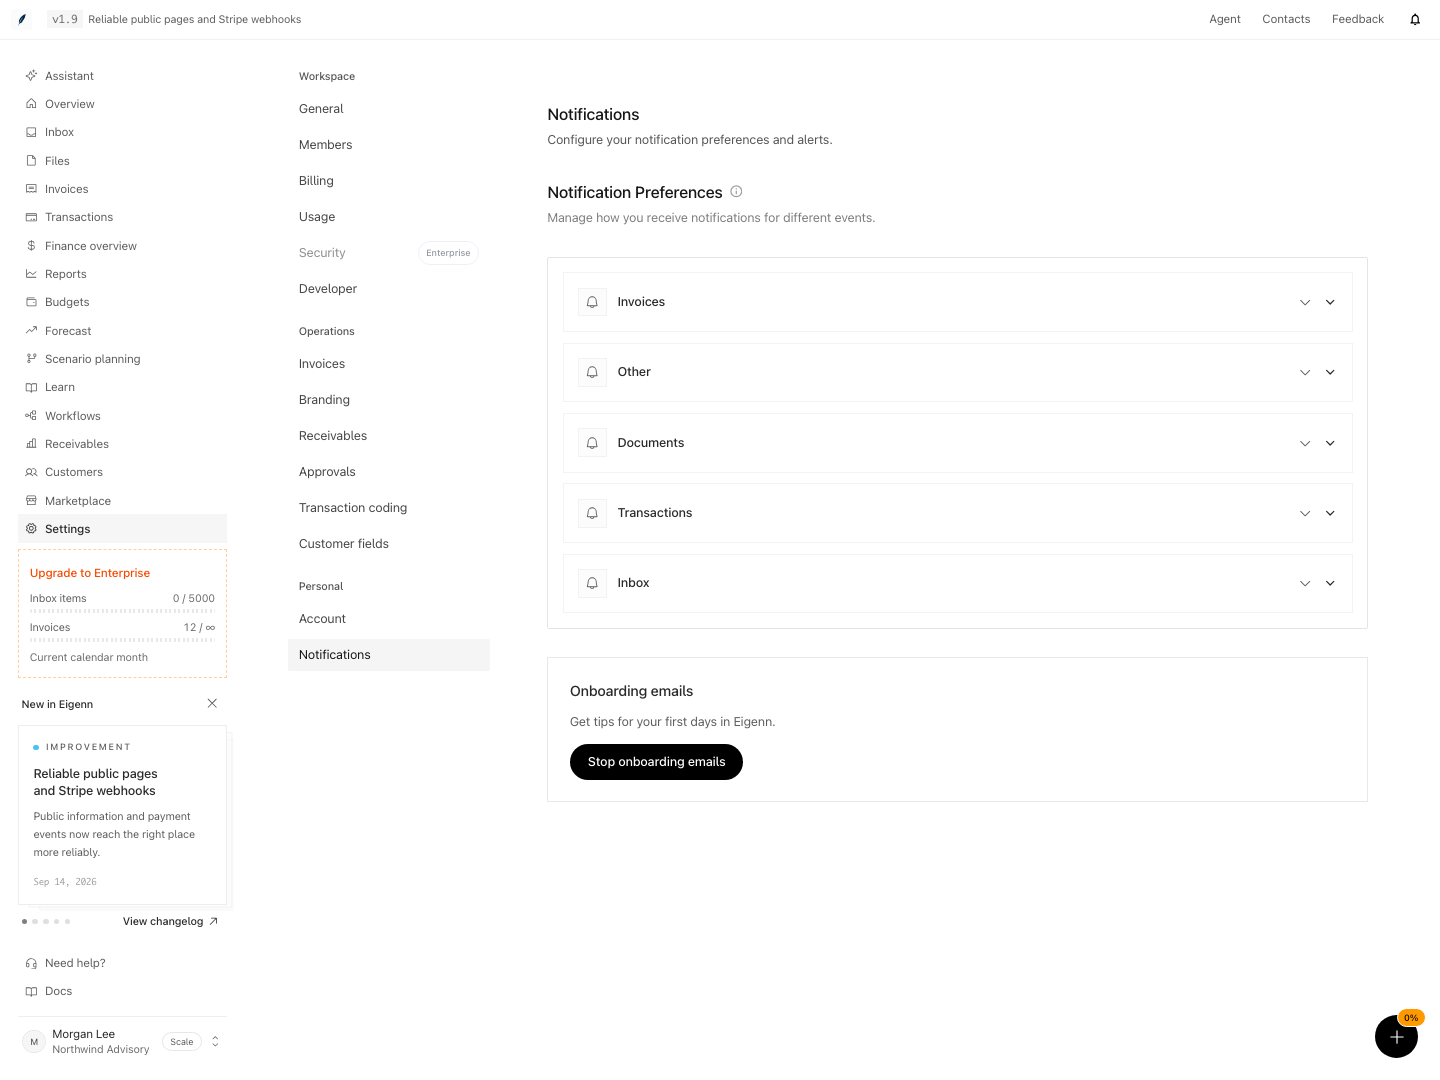
Shown with synthetic data in a local workspace.
Verification
- Open Settings → Notifications and confirm available categories and channel options for your role. Expected: Each relevant event category displays actionable channels.
- Toggle personal notification channels (Email, In-app) and wait for save. Reload the page to check if the selection persists. Expected: Changes are preserved and reflect your choices.
- In Settings → Branding, add or edit the Email Footer Text and the attribution choice. Save and trigger a customer-facing email. Expected: Footer matches input, and attribution displays as chosen.
- Add a custom sender domain, copy and publish all required DNS records at your DNS provider. Select Verify Domain and wait. Expected: Domain status changes to Verified and outgoing mail uses the new domain in the From address.
- Trigger a notification event that should result in an email. Confirm operator receives or does not receive the alert as per their channel preference. Expected: Alert delivery matches configured preference.
- In case of removal/replacement of sender domain, delete the domain and send a new notification. Expected: Emails now use the default Eigenn sender address.
- For any DNS or switch-related issues, consult the troubleshoot section for recovery guidance. Expected: Each listed troubleshooting step resolves the described symptom.