Plans and adjustments
Tag scenario changes with named initiatives, stack several adjustments on one cell, and show their direct effect on a plan timeline.
A plan is a named initiative, such as "Sales expansion" or "Office move". Tag the scenario changes with plans to record why a forecast value changed. One cell can carry adjustments from several plans. Dependent formulas use the adjusted total.
Plans are part of the full model, so only a team Owner can use them. A shared-view reader sees the adjusted numbers, but not the plan names, adjustments, or timeline.
1. Create a plan
- Go to Scenario planning → open a model.
- Select Plans above the grid.
- Select New plan.
- Enter a Plan name. The maximum is 120 characters.
- Optional: set Color, Group, Owner, Start period, and End period.
- Select Save plan.
Each model has a Default Plan. It holds the changes that have no named plan. You cannot edit, archive, or group it. Groups have one level only. A plan inside a group cannot be the group of another plan.
2. Add adjustments to one cell
- Make a forecast scenario active. Adjustments do not apply to the base.
- Select a forecast cell.
- Select Tag plan / adjustments. The Plans panel opens at Cell adjustments.
- In Tag plan, choose a plan.
- Enter the Adjustment delta in model units. For a percent rate,
0.01adds one percentage point. - Select Set adjustment.
Repeat with another plan to stack a second adjustment. Set adjustment on the same plan replaces its delta.
| Part | Revenue, Sep '26 |
|---|---|
| Value without adjustments | 100,000 |
| Sales expansion | +10,000 |
| Growth initiatives | −2,000 |
| Cell value | 108,000 |
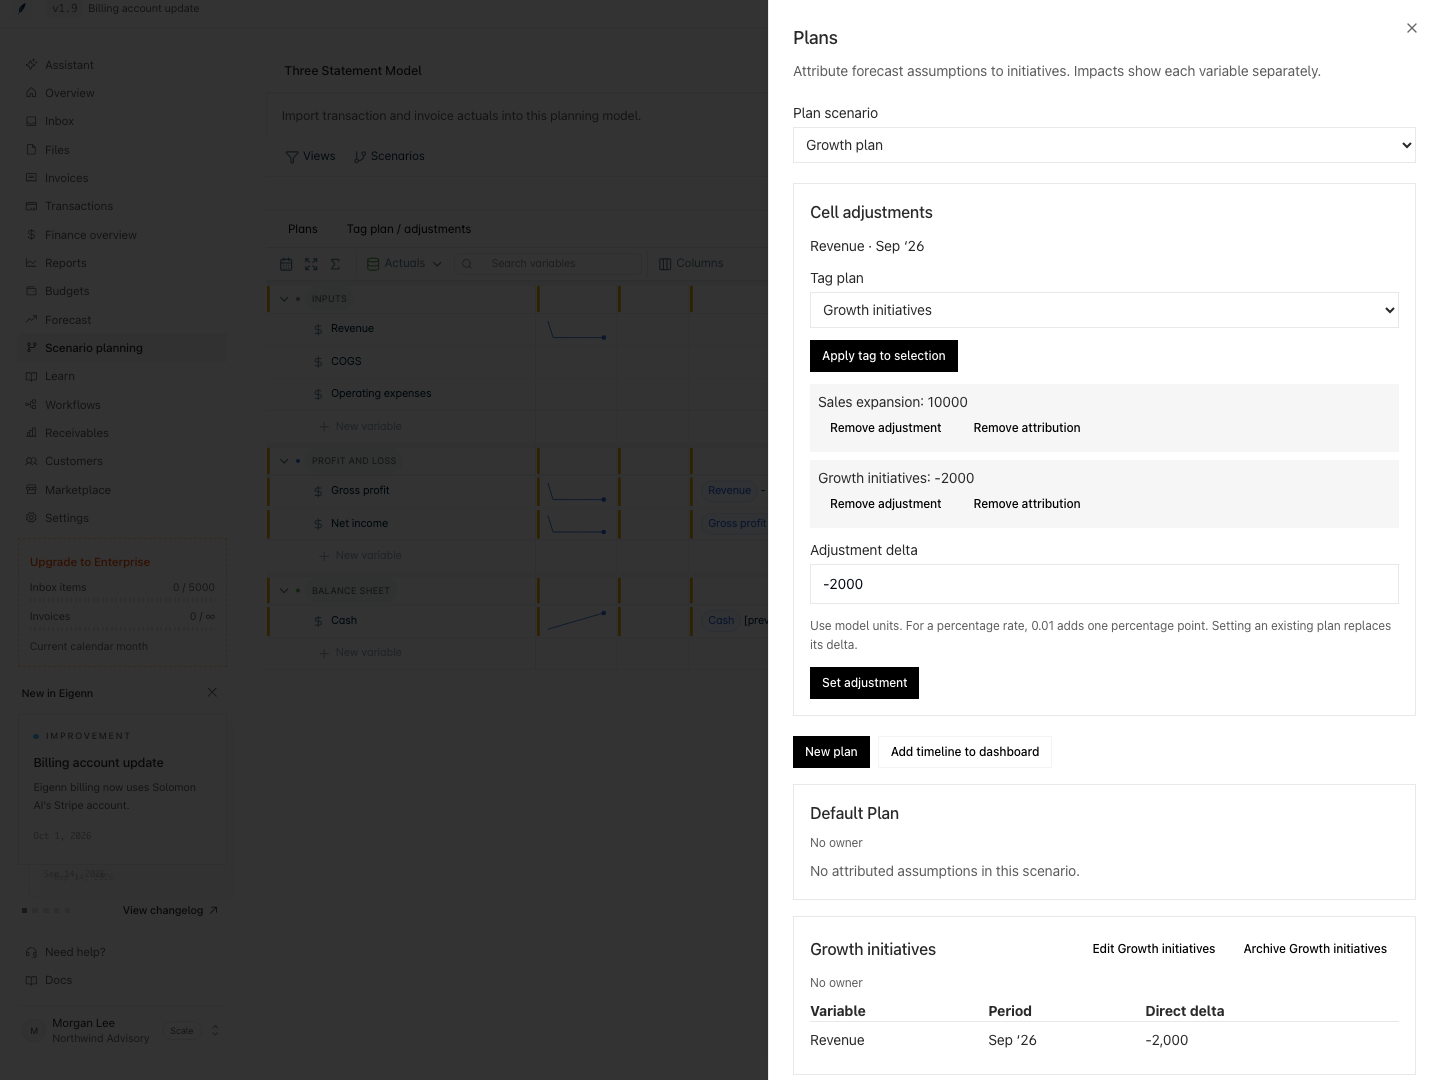
Under each adjustment:
- Remove adjustment removes its effect on the value.
- Remove attribution moves the delta to Default Plan. The total does not change.
A cell with a fixed override shows "Absolute assumption". Select Convert to adjustments to change it into adjustments with the same total.
3. Tag many cells
- Select a cell, then Shift-select the end of a range.
- Select Tag plan / adjustments. The panel lists the selected cells that have a scenario override.
- In Tag plan, choose a plan.
- Select Apply tag to selection.
A tag does not change a value. If a cell has adjustments from several plans, the tag moves their total to the chosen plan. If one cell cannot take the tag, Eigenn refuses the full selection.
4. Show the plan timeline
- In the Plans panel, choose the Plan scenario.
- Select Add timeline to dashboard.
- Close the panel and select Charts.
- Filter with Timeline scenario, Timeline plan, and Timeline variable.
You can also add the card from New chart → Plan timeline. The timeline shows the direct change of each plan by variable and period, after the actuals boundary. It does not count downstream formula effects or periods that actuals replace.
5. Archive a plan
Select Archive followed by the plan name. Existing labels stay readable with "Archived". You cannot choose the plan for a new tag. When you archive a group, its child plans stay active and leave the group. There is no action that deletes a plan.